|
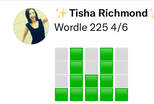
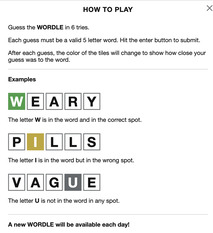
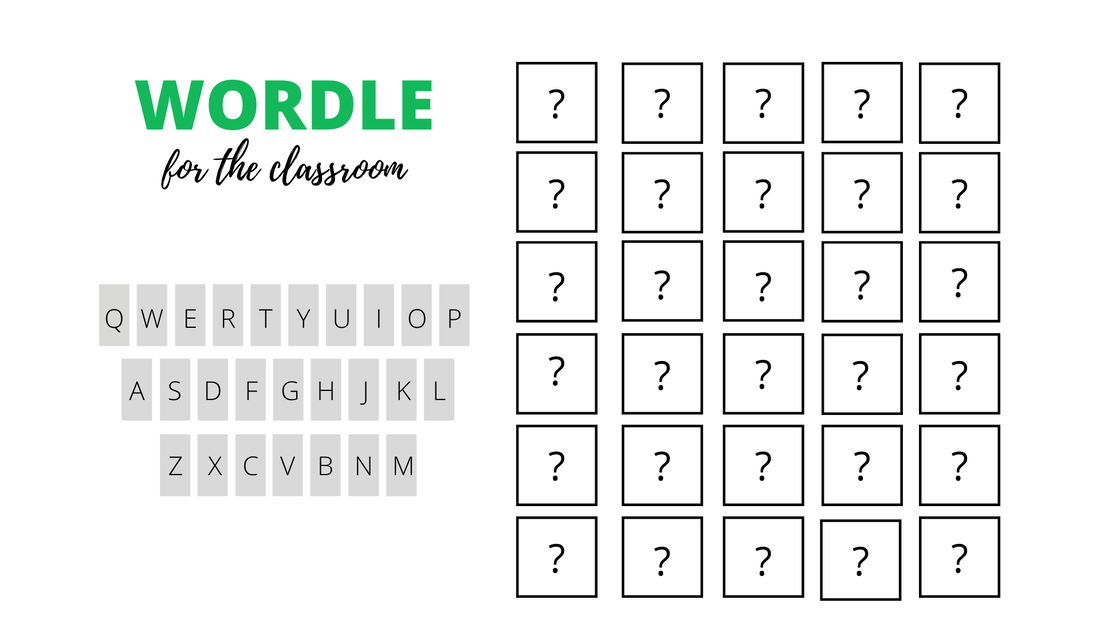
Over the course of a week I noticed many of my friends on social media were posting a perplexing grid of squares in yellow, grey, and green with a secret number code. The more I saw it, the more intrigued I became. I couldn't figure out what it was that was filling my Twitter feed, but I was intrigued! By the seventh day, I couldn't take being in the dark any longer...I had to know! After a little Google research, I had solved the mystery and discovered the daily web-based game, Wordle. The instructions were simple and in a matter of minutes, I had joined millions of others in guessing the word of the day. It has now become a morning tradition to play a game of Wordle along with my morning coffee. This is why I love it, and also why I think it has become so popular so fast. Curiosity Curiosity is what drew me in from the start. I wanted to know what these green and yellow grids were all about. I kept watching them fill my Twitter feed until I couldn't take it anymore. I had to know!! Curiosity is a powerful force! How can we create classroom experiences that elicit wonder & intrigue? Create a little mystery around the learning and you will find your student's interest in your content soars! Community Just as my curiosity was sparked by seeing the grids appear in my Twitter feed, I also felt like I was missing out on something special. There was a community of people that knew what the secret code meant and I wanted to be a part of it. Also, every day everyone in the world playing gets the same word. So when you share out your grid on social media, everyone is comparing your daily stats to their own. It gives everyone a sense of camaraderie to know the experience is shared. Common experiences bond us and make us feel like we belong. When we create a sense of community in our classrooms, students feel like they are part of a family. Incorporate shared experiences that make all students feel a sense of belonging and you will find that your classroom will become a very special community of learners that grow together. Strategy When I talk to other Wordle players, I am often asked, "How do you pick your first word?". Some pick at random, some have the same they use every time. Regardless, every player develops a strategy for what word will be entered first in hopes to increase the probability that the word will be guessed in the fewest amount of tries. When we strategize, we are critically thinking about the game and what is going to generate the best outcome. When we teach students to strategize, we are helping them develop important skills that will empower them as learners. Chance Regardless of the strategy you use to select your first word, there is still an element of chance involved. You may select a word that just happens to include 3 or more of the correct letters, or you may strike out and not get any letters correct at all. This levels the playing field knowing that even the most strategic and skilled wordsmith, may have an unlucky day. When we incorporate some elements of chance into learning, it adds agency and fun. Add a gamified twist to a lesson by adding dice or a spinning wheel and student engagement will soar! Scarcity No matter how much you love playing Wordle, you only get one shot a day. This increases the stakes a bit, knowing that the daily word puzzle will only be available to figure out once. One chance to play; one chance to share with the world. The good news is, there is always tomorrow. It's a lesson in supply and demand. When items are limited, we are much more interested in them and their value is at a premium. What if we created exciting learning experiences in our classroom that are only available for a "limited time"? How much more interested would students be in the learning? Intuitive The directions were short, full of visual graphics, and easy to understand. I was playing within a few minutes. If the directions were difficult to understand or too lengthy, I may have decided to pass no matter how curious I was. See the actual directions from the Wordle site below. Finding ways to make learning intuitive for students is so important. Break down instructions into its simplest form, add pictures, and keep it short. This can make all the difference in how confident and comfortable students feel approaching the learning. Free Access Wordle is accessible on any web-based platform, and it's free. Enough said! Equitable access is critical in learning. Do all our students have access to the experience we create for them? Making sure every student has an equal opportunity to learn and access the tools we give them is vital. If students can access the learning in class, but not all have an opportunity to access it from home, it creates an unfair learning environment for our students. Being mindful of this when we create our lessons, is so important. Wordle-inspired version for the ClassroomLike any game that I play, I am always trying to figure out a way to bring it into learning. I have created a template in Canva that you can play in any classroom. See the video below to learn how to play. Wordle & Pico Fermi Bagel-Inspired Canva Templates Below I have shared two different game templates to use with your students. The first one is the Wordle-Inspired Canva template. The second one is very similar, but you play with numbers instead of words! The directions for each are in the first slide of the template. Simply click on the button below and you will have your very own template to use with your students! WORDLE-STYLE GAME NOW ON FLIPPITY TOO! Have fun and share out your ideas on Twitter and tag me: @tishrich!
1 Comment
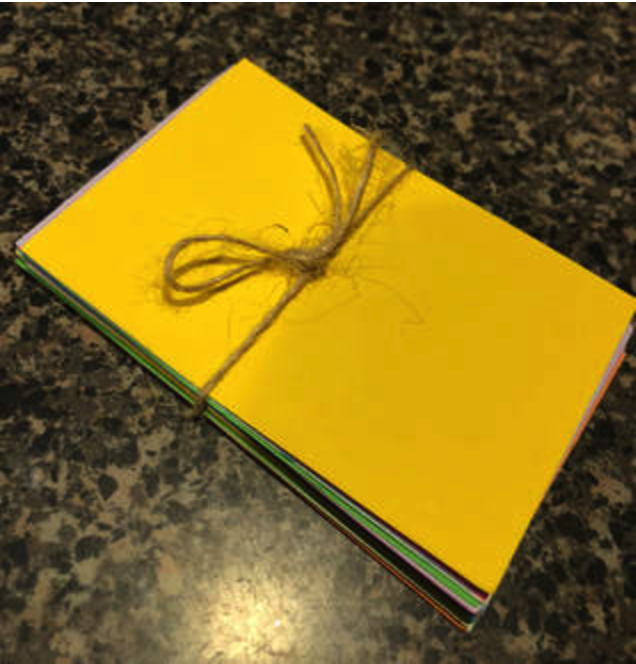
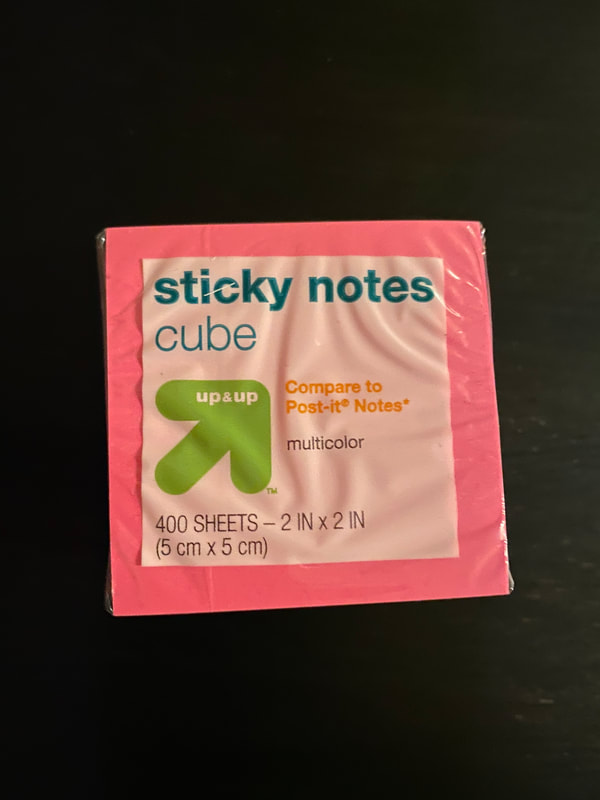
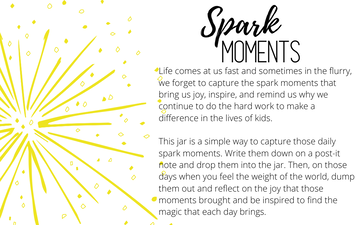
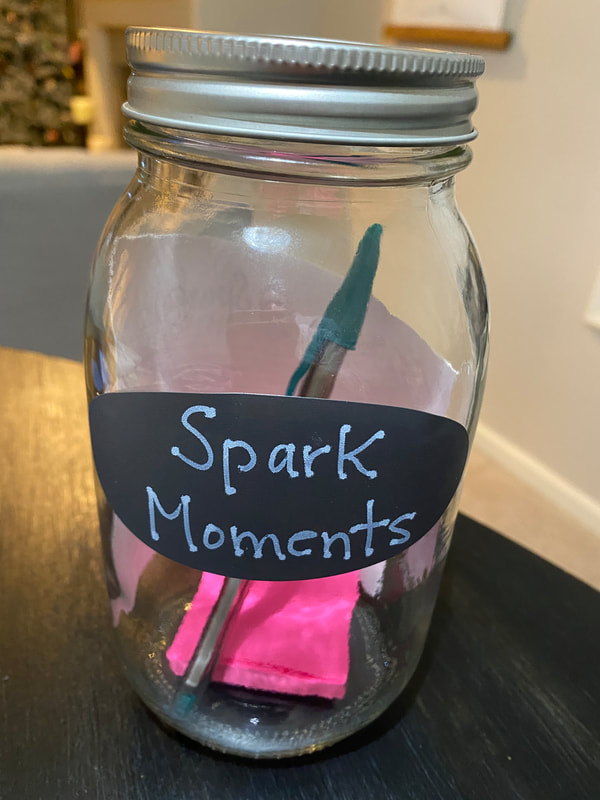
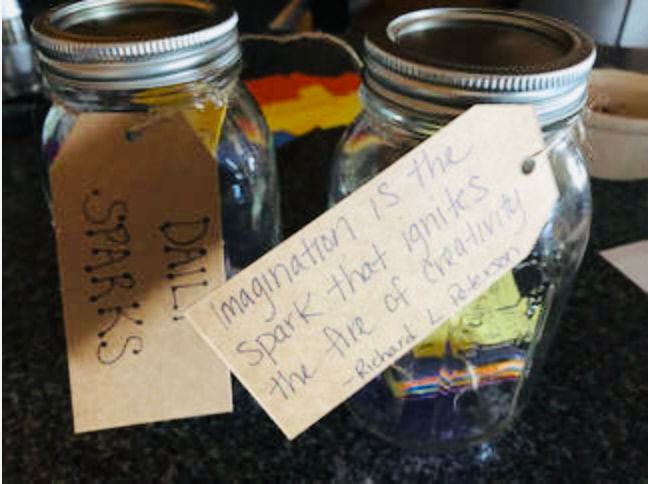
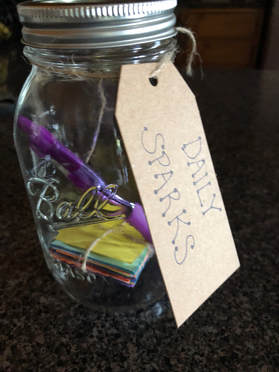
Updated from a post I wrote in 2018 Building meaningful relationships from the beginning is really important to me. It was always a priority as a teacher, and it is a priority in my role as a Student Engagement & Professional Development Specialist as well. I serve 20 schools in my position, so I have a lot of area to cover since my Spark Starters are from 20 different schools covering a wide area. A dear friend and colleague of mine was chatting with me the first year in my district role about how we needed to collect our "greatest success" moments this year with all the new adventures we are beginning. That's when my friend Jenni had an idea to create a jar to collect them that we can reflect back on. I loved this idea so much that another lightbulb moment happened! What if I create jars for each of the "Spark Starters" to collect "Daily Spark" moments?! I could deliver them when I visit each of them at their schools in the first month of the school year! With a plan developing in my head, my colleague and I hurried off to Walmart on the hunt for a few items for our jars. The items were easy to find and even more fun to assemble. Here are the directions: DAILY SPARK JAR ASSEMBLY Mason Jars Colorful pens Colorful Cardstock or Post-It Notes Tags Twine or Ribbon Directions: 1. Cut the cardstock using a paper cutter into small rectangles and tied 30 pieces together with twine. You could also use a pad of Post-It Notes instead. (I purchased Sticky Notes to save time after the first year) 2. Create a message and print it out on cardstock to place inside the Jar. You can use this Spark Moments template I created in Canva to customize and print your own. 3. Create tags to tie on front of the jar that say, "Daily Sparks" or "Spark Moments" on one side and an inspirational quote on the other. You could also design these in Canva or another digital creation tool and print to save time. As an alternative, buy Chalkboard labels and instead of tying a tag around the lid, write on the label and adhere it to outside of the jar. 4. To assemble, place the cardstock bundle, pen, and instructions in each (I threw in a Make Learning Magical sticker too). Screw on the lid and tie a tag around the top with twine or ribbon or adhere a chalkboard label to the front of the jar as shown above. 5. VOILA'! The Daily Spark jar is ready for delivery! The best part of this process was delivering them! I absolutely love the adventure of driving to schools and finding each Spark Starter's classroom. It was a wonderful way to see them in their element and in many cases meet them for the first time. It brings so much joy to my heart to be able to give this gift of love and appreciation for accepting my invitation to be on our Innovation Team!
Each month when we meet for our Spark Sessions, I begin with Spark Moments and everyone shares their favorite moments since the last time we met. Each month we share in a different format. We have shared in Jamboard, Canva, in the Zoom chat, Word Clouds, and Padlet, and Pear Deck. The possibilities are really endless, and all equally powerful! Beginning our time together sharing special moments sets the tone in a positive and encouraging way. Regardless of your educational role, Spark Jars are a wonderful gift to create for others and yourself! I encourage you to create a Spark Jar to bring into the new year to help focus on the sparks that surround us every day!  This is an expanded version of an earlier blog I wrote. One of my favorite things about my role as a Student Engagement & Professional Development Specialist is bringing new ideas and strategies into classrooms. Every year I visit high school AVID classes and teach them one of my favorite note taking strategies, sketchnoting. I discovered this form of visual notetaking about 7 years ago at a conference and immediately knew that this was a strategy that could transform the way that I took notes forever. After spending that summer sketchnoting Youtube videos, podcasts, and book chapters, my prediction had proven true. I was hooked on sketchnoting and I would never look back. I love incorporating doodling games into the sketchnoting sessions I facilitate. Some of them are adaptations of ideas I've found over the years and many were inspired by a session facilitated by Sunni Brown at IntegratED in Portland, Oregon I attended 6 years ago and her book The Doodle Revolution. My session participants, young and old, enjoy them so much I thought I’d share the games with you. For each game, I've shared how it can be played using paper, or digitally using interactive PearDeck slides or Pop-Up activities, or using the new "Draw" feature in Canva. The variations allow for you to play in a remote, hybrid, or brick and mortar classroom. Additionally, they can be played indvidually or combined together. Endless possibilities! 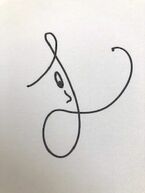 FACE IT Idea from Doodle Revolution, by Sunni Brown For this game, students grab a piece of paper and pen and closing eyes, poise the pen over the page. When you say go, they make a haphazard wild mark on their page with at least one change of direction in it. Once the mark is drawn, they open their eyes and make a face from it; eyes, mouth, and nose. This is a great way to get the room relaxed and bring a smile to everyone’s face. Pear Deck variation: Add an interactive "Draw" slide to your Pear Deck presentation or create a Pop-Up activity with a "Draw" slide. Students draw their haphazard mark directly on the slide with their finger or stylus. Students open their eyes and make a face from it; eyes, mouth, and nose using colors, if they choose. When students are finished, "show responses" on the screen scrolling through each one. Students love this because they are able to see everyone's creations, and it's anonymous. Canva variation: Create an 11" x 8.5" design that includes 1 blank page for each student. Have every student claim a page. Using the "Draw" feature in Canva, students draw their haphazard wild mark on their claimed page. After the 20 seconds is up, "present" the design on the screen to show all of the doodles.  BIRD ON A LINE origin unknown This game is played the same as Face It, except instead of making the line into a face, you make it into a bird with eyes, a beak, wings and feet. I came up with the name, however I know I found the idea somewhere....just can’t for the life of me remember where! Pear Deck and Canva variations are similar to the Face It variation 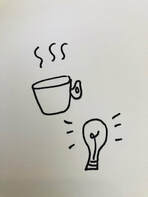 GRAPHIC JAM Idea from Doodle Revolution, by Sunni Brown For this game, students are given 20 seconds to doodle a word that you display on the screen. Often times I will start with more concrete words like coffee and apple and end with more abstract words like idea or brave. After the 20 seconds are up, have students pass their paper around the table until each person gets their paper back again. If the room is set up in rows, students can either trade with the person sitting next to them or pass their paper back through the row and the last person passes the papers back to the original owner. Pear Deck variation: Add an interactive "Draw" slide to your Pear Deck presentation or create a Pop-Up activity with a "Draw" slide. Students draw their doodle directly on the slide with their finger or stylus. After 20 seconds is up, "show responses" on the screen scrolling through each one. Canva variation: Create an 11" x 8.5" design that includes 1 blank page for each student. Have every student claim a page. Using the "Draw" feature in Canva, students draw their doodle on their claimed page. After the 20 seconds is up, "present" the design on the screen to show all of the doodles. I love this activity because it helps students visualize the images in their head. It also shows that everyone visualizes things differently. There is no right or wrong way to doodle an image. The important part is that it represents something to the person who is doodling it. Often times I will choose words for this Graphic Jam that are in the video clip they will be practicing sketchnoting with at the end of the session. By doing this, participants will be able to pull that image more readily when doodling it again. 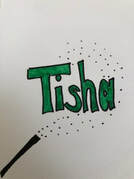 In my sessions I explain how to incorporate text, images, and structure into sketchnotes. The following games are a great way for students to practice these components. NAME IN LIGHTS Idea from Doodle Revolution, by Sunni Brown For this game, I tell students they are going to practice a word they’ve been writing since they began school, their name. After explaining text and some of the possible font variations, they write their name on the paper using whatever font they choose. When done they can color their name and add lights or any other symbols that represent them. I love seeing all the different styles students come up with. They have a lot of fun with this. I usually give them about 3-5 minutes for this, but time can vary. Pear Deck variation: Add an interactive "Draw" slide to your Pear Deck presentation or create a Pop-Up activity with a "Draw" slide. Students write their name directly on the slide with a stylus. After 20 seconds is up, "show responses" on the screen scrolling through each one. Just like in the other doodling games I've shared, students love to see everyone's creations. Canva variation: What better way to practice fonts than to use fonts in the Canva library and trace over them! Create an 11" x 8.5" design that includes 1 blank page for each student. Have every student claim a page. Have students type their name using a font of choice. Using the drawing tool, have students trace over the letters to practice, then remove the text when they're done. Of course, students can opt to create their own font rather than trace over an existing font, if they choose. Students can doodle around their name or bring in other Canva elements or animations that best represent them! After the time is up, "present" the design on the screen to show all of the doodles. I love how Canva takes this game to another level! 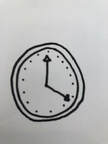 5 SHAPE DOODLE origin unknown This is another game I discovered over the years, and can't figure out where! For this game, students are given 2 minutes to find something in the room and doodle it using only these 5 shapes: triangle, circle, square, dot, and line. This is a great way to explain that we don’t have to be artists to doodle. If you can draw these 5 basic shapes, you can draw most anything! Pear Deck variation: Add an interactive "Draw" slide to your Pear Deck presentation or create a Pop-Up activity with a "Draw" slide. Students doodle their object directly on their slide using the colors available. They can even incorporate the line feature on their slide, if they wish. After the 2 minutes is up, "show responses" on the screen scrolling through each one. Canva variation: In Canva, students can doodle or combine shape elements from the library. Create an 11" x 8.5" design that includes 1 blank page for each student and include a dot, circle, square, triangle, and line from the Canva library. Have every student claim a page. Students can move the shapes around to create the object. Once arranged on slide, students doodle right over the shapes and remove them when done. They then can shade in the object with colors of choice. After the 2 minutes is up, "present" the design on the screen to show all of the doodles.  EMOJI THIS Variation of Sunni Brown’s Stickify This I came up with this variation based on the game below. I call out an emotion and students draw a face expressing that emotion within 1 minute. I love how this illustrates how much we can convey just with a simple emoji. Pear Deck Variation: Add an interactive "Draw" slide to your Pear Deck presentation or create a Pop-Up activity with a "Draw" slide. Students doodle a face expressing the emotion called out directly on their slide using the colors available. They can even incorporate the line feature on their slide, if they wish. After 1 minute is up, "show responses" on the screen scrolling through each one. Canva Variation: Create an 11" x 8.5" design that includes 1 blank page for each student. If you wish, you could add emojis from the Canva library so they have a visual to look at when they are doodling their emojis. When you say go, students doodle a face expressing the emotion called out directly on their page using the colors available. After the 1 minute is up, "present" the design on the screen to show all of the doodles.  STICKIFY THIS Idea from Doodle Revolution, by Sunni Brown This game is much like Emoji This. I call out an action word and the participants have to doodle a stick figure demonstrating that action. As with Emoji This, it is a wonderful way to illustrate how a simple stick figure can convey emotion as well as action. Pear Deck Variation: Add an interactive "Draw" slide to your Pear Deck presentation or create a Pop-Up activity with a "Draw" slide. Students doodle a stick figure demonstrating the action called out directly on their slide using the colors available. They can incorporate the line feature on their slide to create the stick figure, if they wish. After 1 minute is up, "show responses" on the screen scrolling through each one. Canva Variation: Create an 11" x 8.5" design that includes 1 blank page for each student. When you say go, students doodle the action called out directly on their page using the colors available. They can bring other elements from the Canva library and or animations to further illustrate their action. After the 1 minute is up, "present" the design on the screen to show all of the doodles. Sketchnoting Practice & ReflectionSKETCHNOTING PRACTICE At the end of every sketchnoting session, I have participants practice. I usually select Youtube videos that have steps and are no more than 5-10 minutes in length. Sometimes the videos are connected to the content, sometimes they aren't. It depends on the learners and the class that I'm facilitating the session for. I find that scaffolding their first practice session is really important. When you learn something new all your focus is taken learning that skill, so it's hard to absorb any additional content. By scaffolding the sketchnoting process the first few times, it helps the learner focus on the content being sketchnoted as well as the process of sketchnoting itself. Without the initial scaffolding, I've often found people get frustrated and are less likely to give it a second try thinking it must not be for them. Click HERE for an example of a video I've used. To begin practice, I give students a few minutes to write their title, cite source, and set up the structure. I tell them how many steps are in the video so they can write them on their paper in whatever structure they wish. I also will give a list of words that they may choose to draw during the video so they can start thinking about the image that comes to mind. As mentioned before, I use some of these words when doing the Graphic Jam game so they've already doodled these images once. Once the video starts I pause it for a minute after every step so they have time to complete their notes for that step. I find that by doing this, students feel more relaxed and can process as they go. I have created some sketchnoting templates that can be found in the Canva library as well, if you'd like to customize and print. Once students, have had some practice on paper, have them try in Canva! Check out the video tutorial below to learn how to use the "Draw" feature in Canva. REFLECTION One of the most important parts of this process that often gets overlooked is reflection. By allowing 5-10 minutes after the video is over for students to finish their sketchnotes gives time to shade in, add more images and text, and reflect and process what they just took notes on. This step has been extremely valuable to me as well as my students and others that I've helped teach this process to. GAME CHANGER! Recently when I visited classrooms, I had a few students in my session that had been in my session in another class. When they saw me, they said, "Are you teaching sketchnoting again?! That was the best lesson I have had all year! I love sketchnoting...it's helped me so much!" It made my day to hear this feedback. It truly is a game changer for many students, I know it was for me! LEARN MORE! If you are interested in learning more about sketchnoting check out my resource page with additional blogs and templates below. Also, make sure to follow my inspiration for many of these games, Sunni Brown, and check out her book The Doodle Revolution! This book is rich with inspiration, content and lots more doodling games and activities! Also, make sure to follow other sketchnote extraordinaires, Carrie Baughcum, Monica Spillman, Jen Giffen, Sylvia Duckworth, and Nichole Carter. They are all amazing and have lots of resources, inspiration, and experience to share! |
Tisha RichmondStudent Engagement & PD Specialist in Southern Oregon, Canva Learning Consultant, Canva Education Creator, and author of Make Learning Magical. I'm passionate about finding innovative ways to transform teaching and create unforgettable experiences in the classroom. |
- HOME
- SPEAKING
- ABOUT ME
- BLOG
-
RESOURCES
- Memorable Beginnings >
- Authenticity & Agency
-
Gamified Experiences
>
- Anywhere Learning Plans
- The Amazing Race Game Plan Resources
- The Race to the Golden Ticket
- Ready Player One
- The Amazing Food Truck Race
- The Great Interior Design Challenge
- The Final Table Challenge
- Challenge Rubrics
- Challenge Ideas
- Kitchen Utensil Race & Other Variations
- Code Names for the Classroom
- Badges
- Innovation
- Creativity, Curiosity, and Collaboration
- Authentic Audience
- Legacy
- Make Learning Magical Book
- PODCAST
- T-SHIRTS
- YOUTUBE
-
RECIPES
- Workshop & Session Resources
- Dragon Smart Reviews
Proudly powered by Weebly


 RSS Feed